Installing and updating ZPUI
Installing ZPUI on real hardware (Raspberry Pi and other SBCs)
If you want to use ZPUI on your Linux PC without an external screen&buttons, scroll to the emulator section.
ZPUI is installed by default on official Blepis and ZeroPhone SD card images. However, if for some reason you don’t have it installed on your SD card, or if you’d like to install ZPUI on some other OS, you have to log in (using SSH or keyboard/mouse) and do this:
Installation
# git might already be installed! if so, skip this line
sudo apt update && sudo apt install git
git clone https://github.com/ZeroPhone/ZPUI
cd ZPUI/
# Install main dependencies (apt and pip packages), configure systemd, and create a system-wide ZPUI copy
sudo ./setup.sh
# Run this script to help you configure the IO for ZPUI to use
sudo ./config.py
# Start the system to test your configuration - do screen and buttons work OK?
sudo python3 main.py
# Once tested:
sudo ./sync.sh # Transfer the working system to your system-wide ZPUI copy
Behind the scenes
There are two ZPUI copies on your system - your local copy, which you downloaded ZPUI into,
and a system-wide copy, which is where ZPUI is launched from when it’s started
as a service (typically, /opt/zpui).
When you run ./setup.sh, the system-wide (/opt/zpui) ZPUI copy is created,
and a systemd unit file registered to run ZPUI from /opt/zpui at boot.
The system-wide copy can then be updated from the local copy using the ./sync.sh script.
If you plan on modifying your ZPUI install, it’s suggested you stick to a workflow like this:
Make your changes in the local copy
Stop the ZPUI service (to prevent it from grabbing the input&output devices), using
sudo zpuic stop.Test your changes in the local directory, using
sudo python main.pyIf your changes work, transfer them to the system-wide directory using
sudo ./sync.sh
Such a workflow is suggested to allow experimentation while making it harder
to lock you out of the system, given that ZPUI has to work at all times.
If ZPUI is inaccessible, that might prevent you from knowing your device’s IP address,
connecting it to a wireless network, or turning on SSH.
In documentation, /opt/zpui will be referred to as system-wide copy,
while the directory you cloned the repository into will be referred to
as local copy.
Updating
To get new ZPUI changes from GitHub, you can run “Settings” -> “Update ZPUI”
from the main ZPUI menu, which will update the system-wide copy by doing things like
git pull, pip install -r requirements.txt and running tests (it’s also way
fancier than just running commands, of course).
If you want to sync your local copy to the system-wide copy, you can run sync.sh.
You can also run update.sh to sync and simultaneously update your ZPUI to the latest version from Github.
Controlling the system-wide ZPUI copy
To control the system-wide ZPUI copy, you can use the following commands:
sudo zpuic startsudo zpuic stopsudo zpuic restartsudo zpuic status
These commands call systemctl ACTION zpui for now, but they’re shorter to type.
Launching the system manually
For testing configuration or development, you will want to launch the local copy of ZPUI directly
so that you can see the ZPUI logs in real time, and be able to stop it with a simple Ctrl^C.
In that case, just run ZPUI with sudo python main.py from your local (or system-wide) directory.
If ZPUI is already running system-wide, run sudo zpuic stop to stop it.
Installing the ZPUI emulator
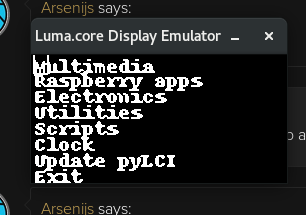
If you want to develop ZPUI apps without having to use hardware like external screen&buttons, there’s an option to use the emulator with a Linux PC - the emulator can use your screen and keyboard instead of ZeroPhone hardware. The emulator works very well for app development, and just as well for UI element and ZPUI core feature development.
System requirements
Some kind of Linux - there are install instructions for Ubuntu, Debian and OpenSUSE, but it will likely work with other systems, too
Graphical environment (the emulator is based on Pygame)
A keyboard (the same keyboard that you’re using for the system will work great)
Behind the scenes
There’s only ever a single copy of ZPUI when using the emulator. So, things like “system-wide copy” and “local copy”
from the first section don’t apply here. This means you won’t be using setup.sh, update.sh or sync.sh - don’t run them.
The “Update ZPUI” feature in Settings app will still work wonders!
Emulator settings
By default, the emulator uses screen mode ‘1’ (monochrome) and 128x64 resolution.
You can pass resolution, mode, and scale settings to the emulator by editing config.yaml:
device: emulator
resolution: 400x240
mode: RGB
scale: 3
Ubuntu/Debian installation
Assuming Python 3 is the default Python version:
sudo apt-get update
sudo apt-get install python3-pip git python3-dev build-essential python3-pygame
git clone https://github.com/ZeroPhone/ZPUI
cd ZPUI
# Run the config script and pick "emulator" IO option
sudo ./config.py
# Install the requirements from pip
# If it complains about externally managed packages, pass --break-system-packages before -r,
# as none of these packages are system-shipped
python3 -m pip install -r requirements.txt
# Run the emulator
python main.py
Arch Linux installation
sudo pacman -Si python-pip git python-pygame
git clone https://github.com/ZeroPhone/ZPUI
cd ZPUI
# Run the config script and pick "emulator" IO option
sudo ./config.py
# Install the requirements from pip
# If it complains about externally managed packages, pass --break-system-packages before -r,
# as none of these packages are system-shipped
python3 -m pip install -r requirements.txt
# Run the emulator
python main.py
OpenSUSE installation
sudo zypper install python-pip git python-devel gcc python-curses python-pygame

git clone https://github.com/ZeroPhone/ZPUI
cd ZPUI
# Run the config script and pick "emulator" IO option
sudo ./config.py
# Install the requirements from pip
# If it complains about externally managed packages, pass --break-system-packages before -r,
# as none of these packages are system-shipped
python3 -m pip install -r requirements.txt
# Run the emulator
python main.py
Emulator credits
Most of the emulator research and work was done by Doug, and later refactored by Brian Dunlay. The emulator input driver was done by Arya. OpenSUSE instructions were compiled with help of piajesse. Arch Linux instructions were compiled by monsieurh.